How to Publish from Google Docs to WordPress Using ClickUp
Integrating ClickUp with Zapier to publish posts can streamline your content workflow, making it easier to manage tasks and publish content directly from your project management tool. In this guide, we’ll walk you through the steps to set up this automation.
What You’ll Need
- A ClickUp account
- A Zapier account
- A Docswrite account
- A WordPress site
Step 1: Set Up Your ClickUp Board
- Create a ClickUp Board: Log in to ClickUp and create a new board specifically for your content workflow.
- Add Cards: Create cards for each piece of content you plan to publish. Include details like the title, and any tags or categories.
Important:
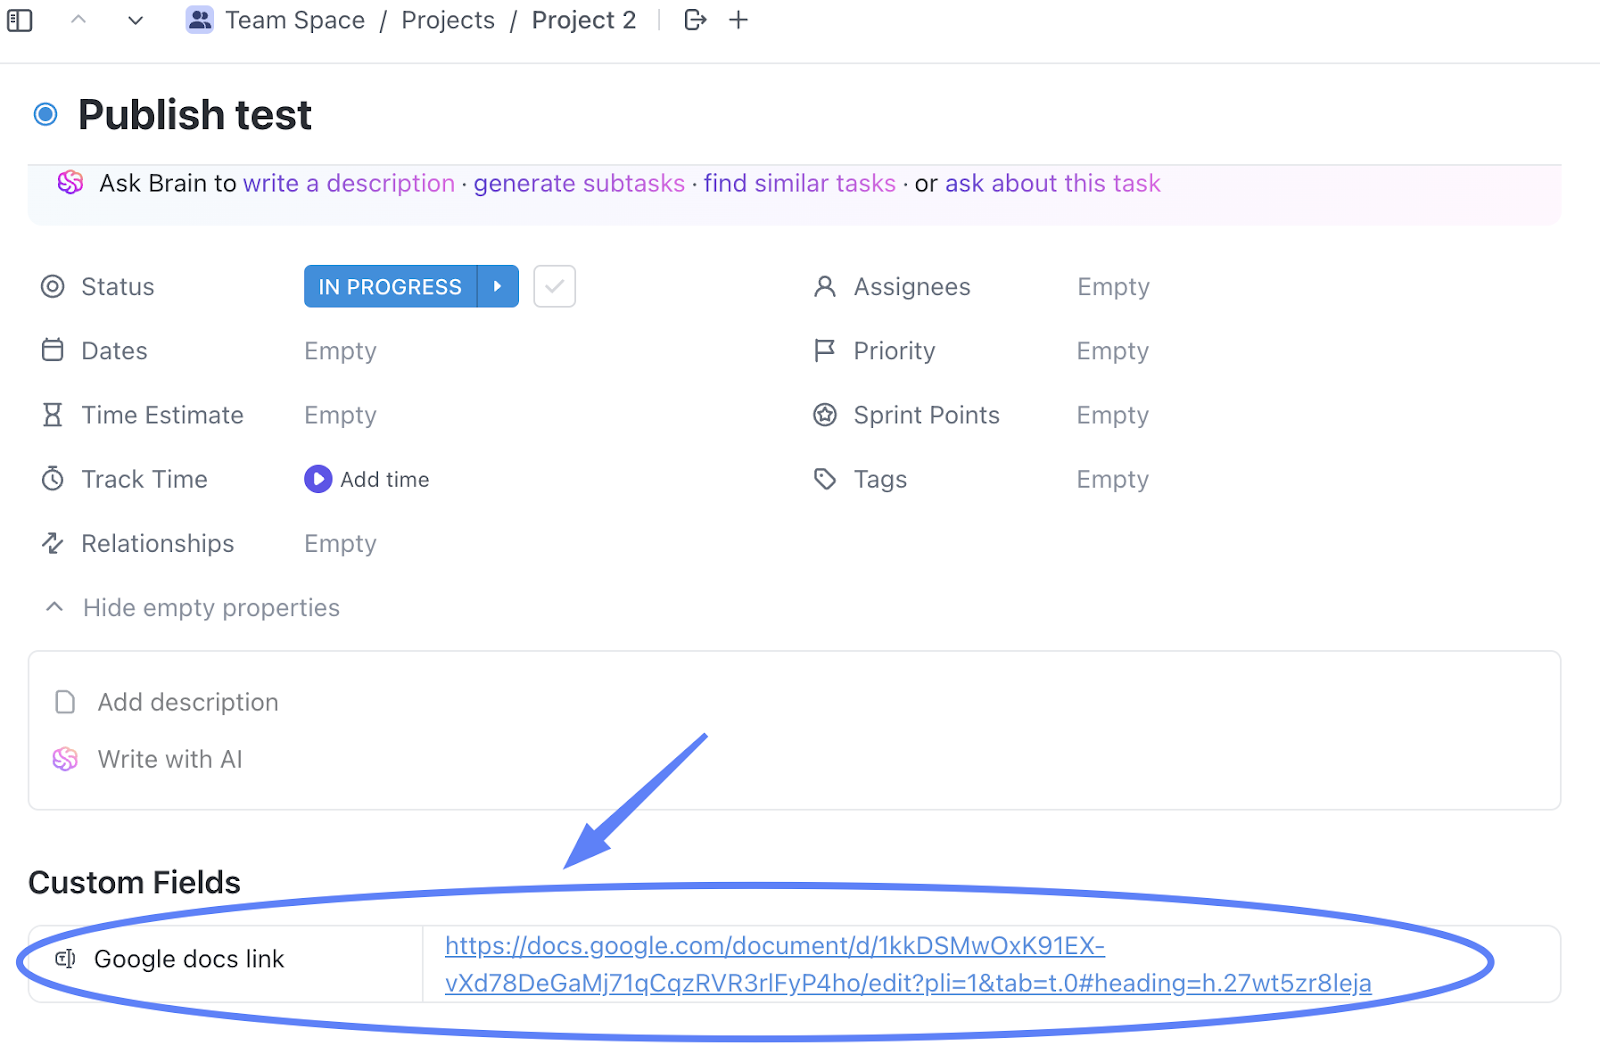
You need to create 1 Custom Field :
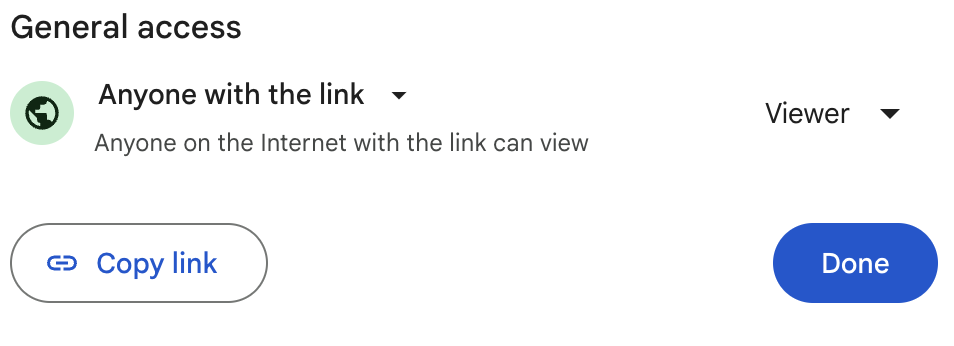
- 1st custom field will be "Google Docs Link" - this is where you will attach the link of the Google Doc. Make sure that this link is publicly available
Step 2: Create a Zap in Zapier
- Log in to Zapier: Go to Zapier and log in or create an account.
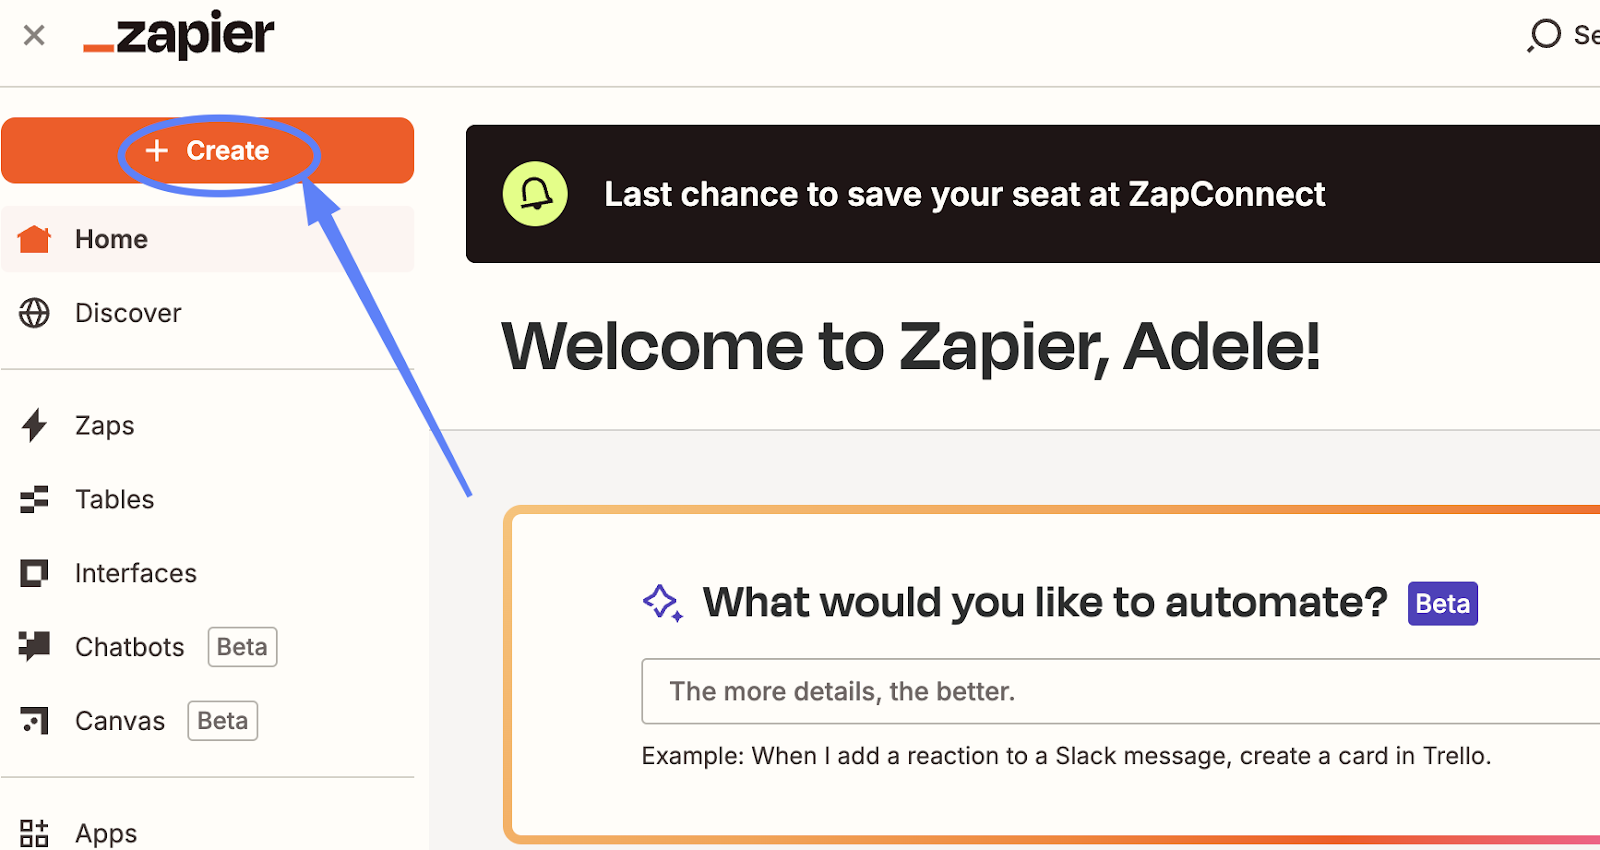
- Create a New Zap: Click on the "Make a Zap" button.
Step 3: Set Up the ClickUp Trigger
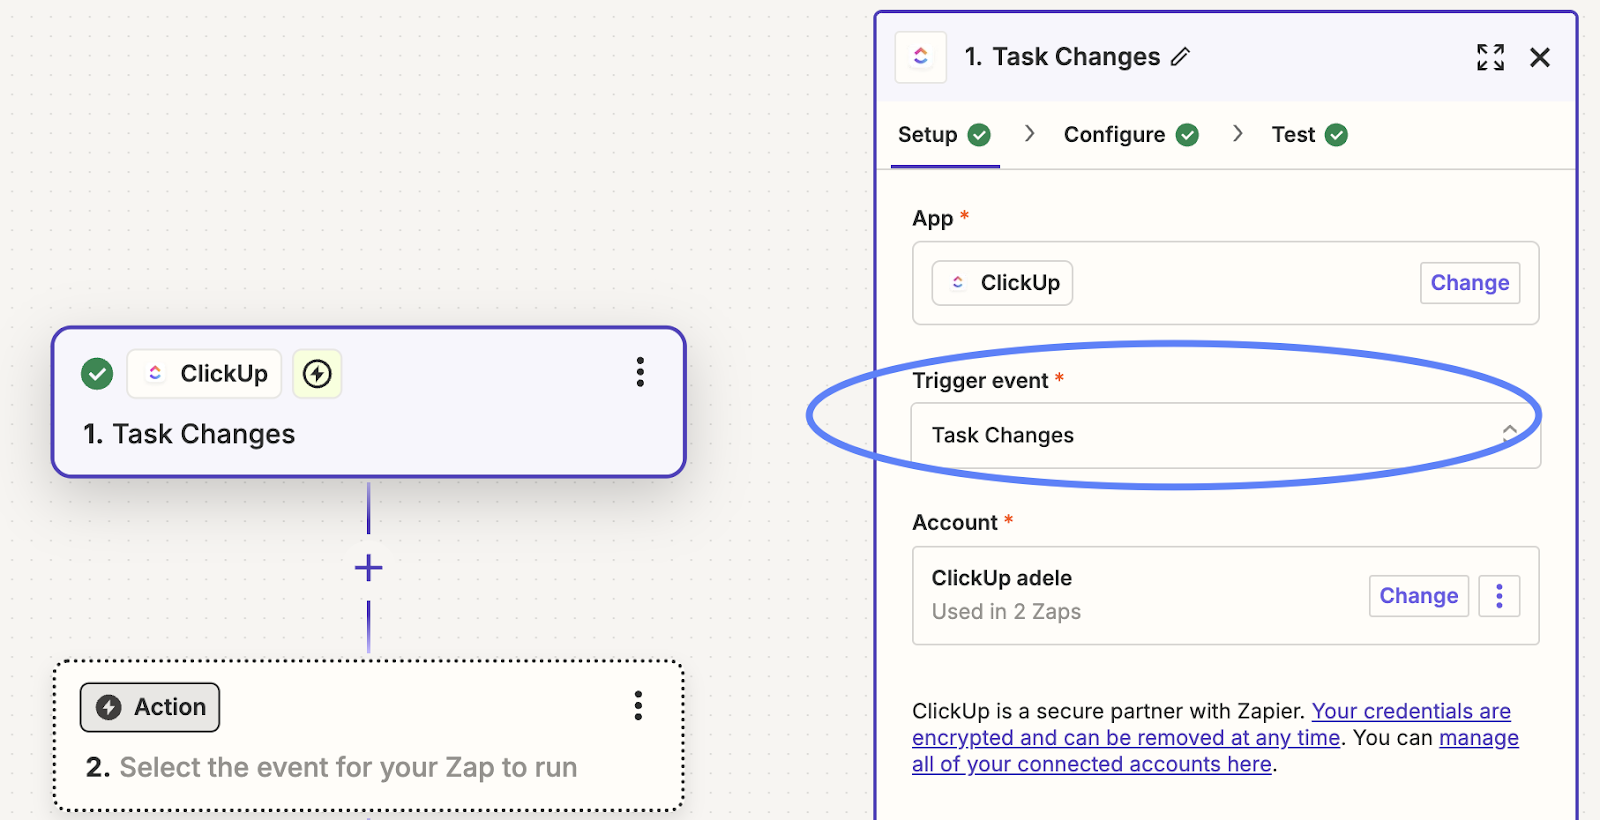
- Choose ClickUp as the Trigger App: Search for and select ClickUp.
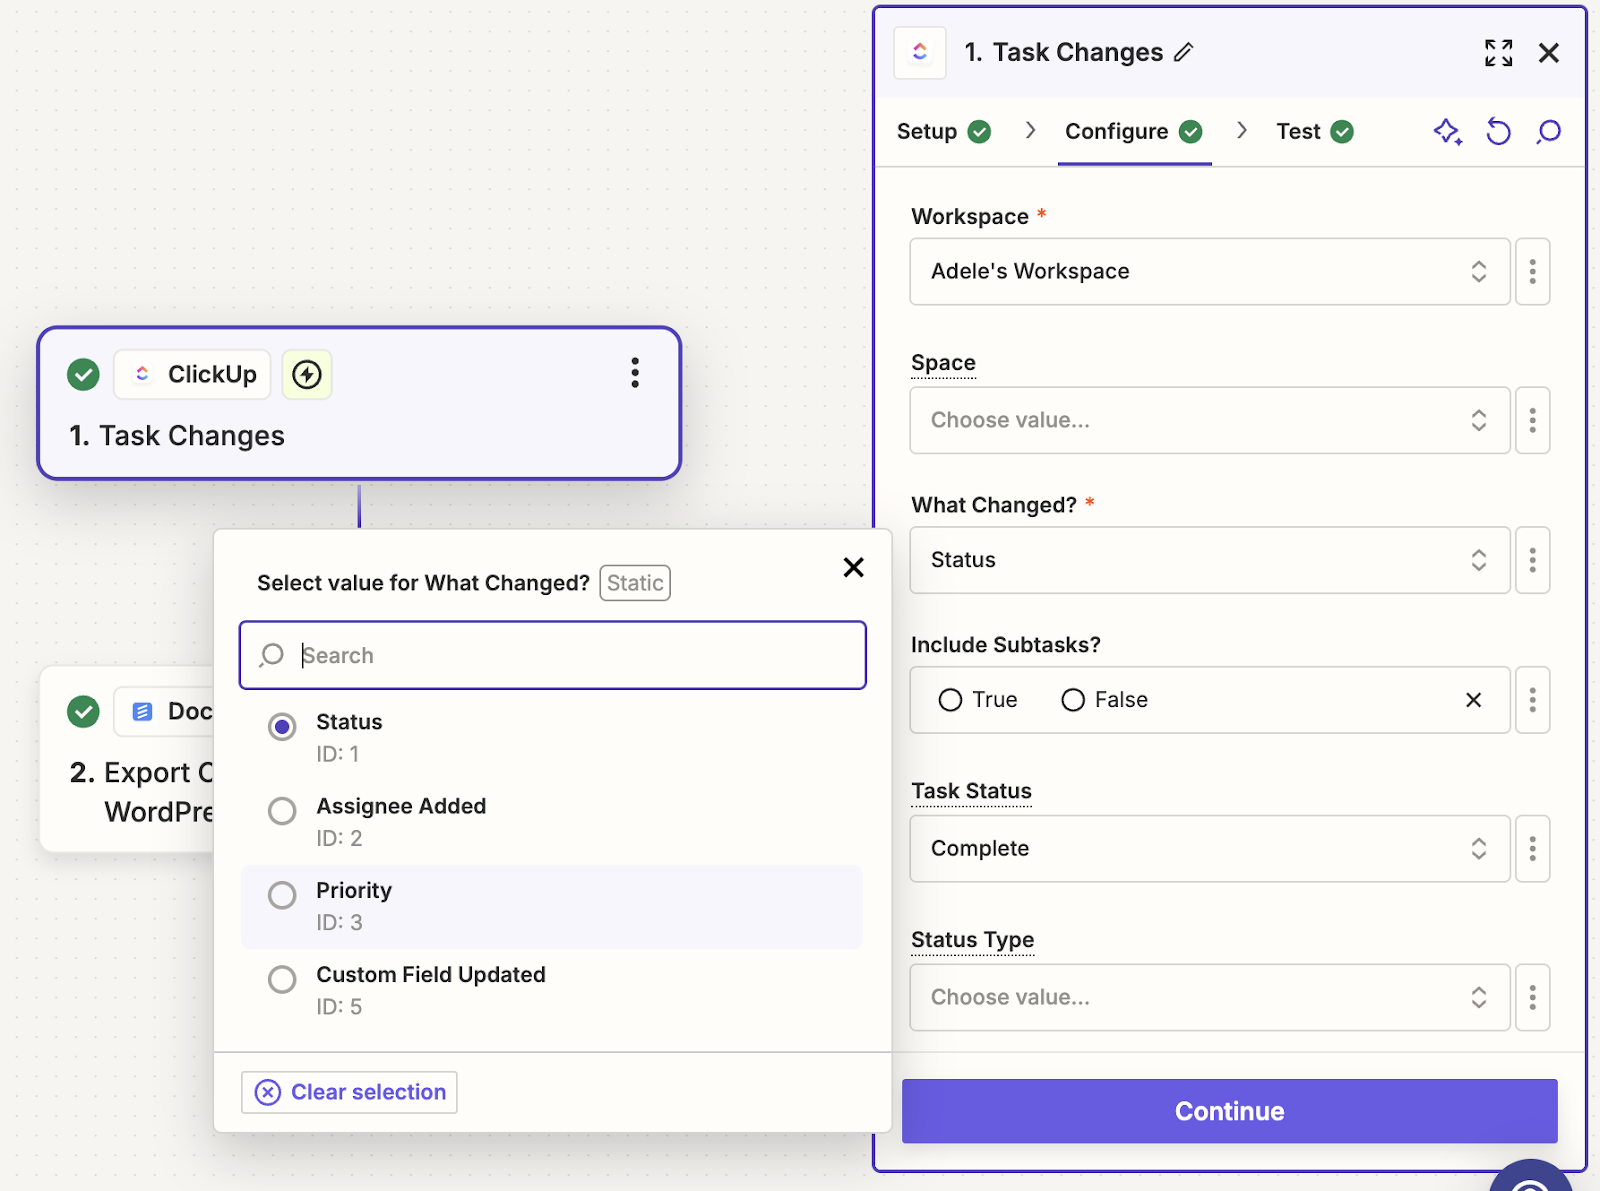
- Select the Trigger Event: Choose the event "Task Changes" based on your workflow needs.
- Connect Your ClickUp Account: Authorize Zapier to access your ClickUp account.
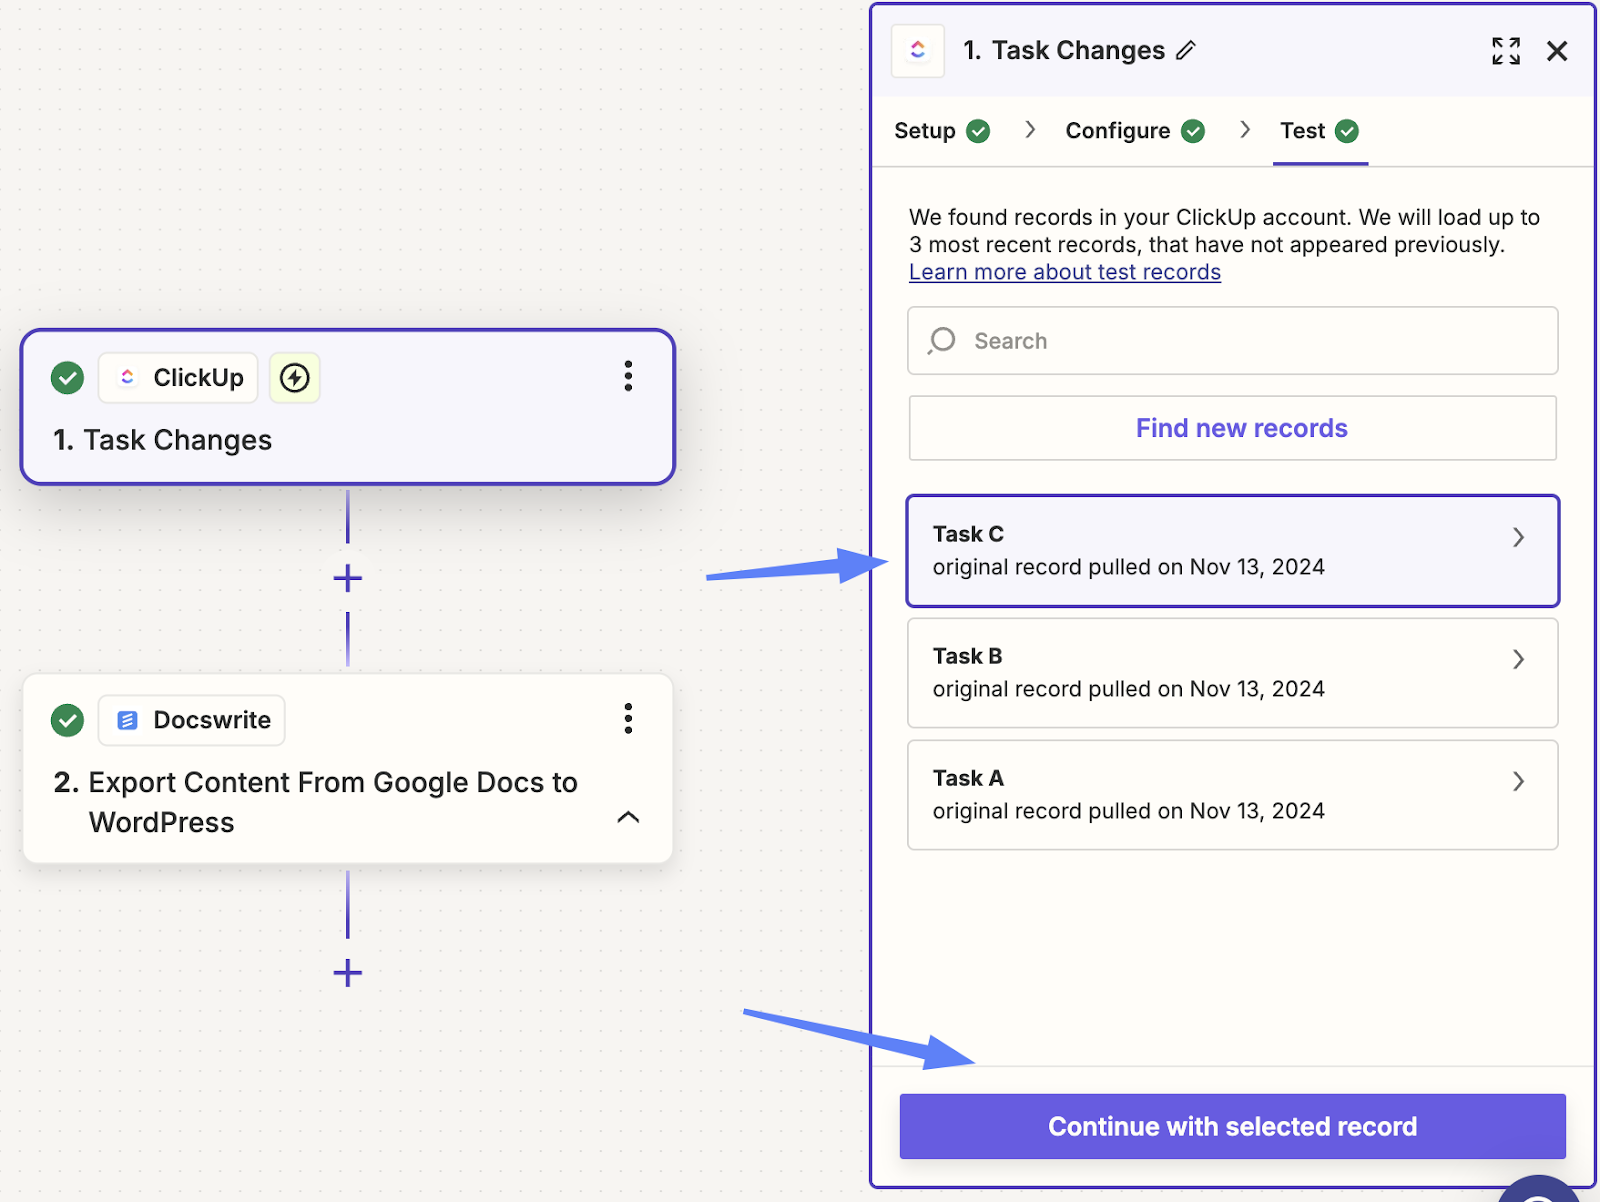
- Set Up Trigger Options: Select the board and list from which you want to trigger the zap. Click "Continue" and test the trigger to ensure it works.
5. How to configure :
Step 4: Set Up Docswrite
- Choose Docswrite as the Action App: Search for and select Docswrite.
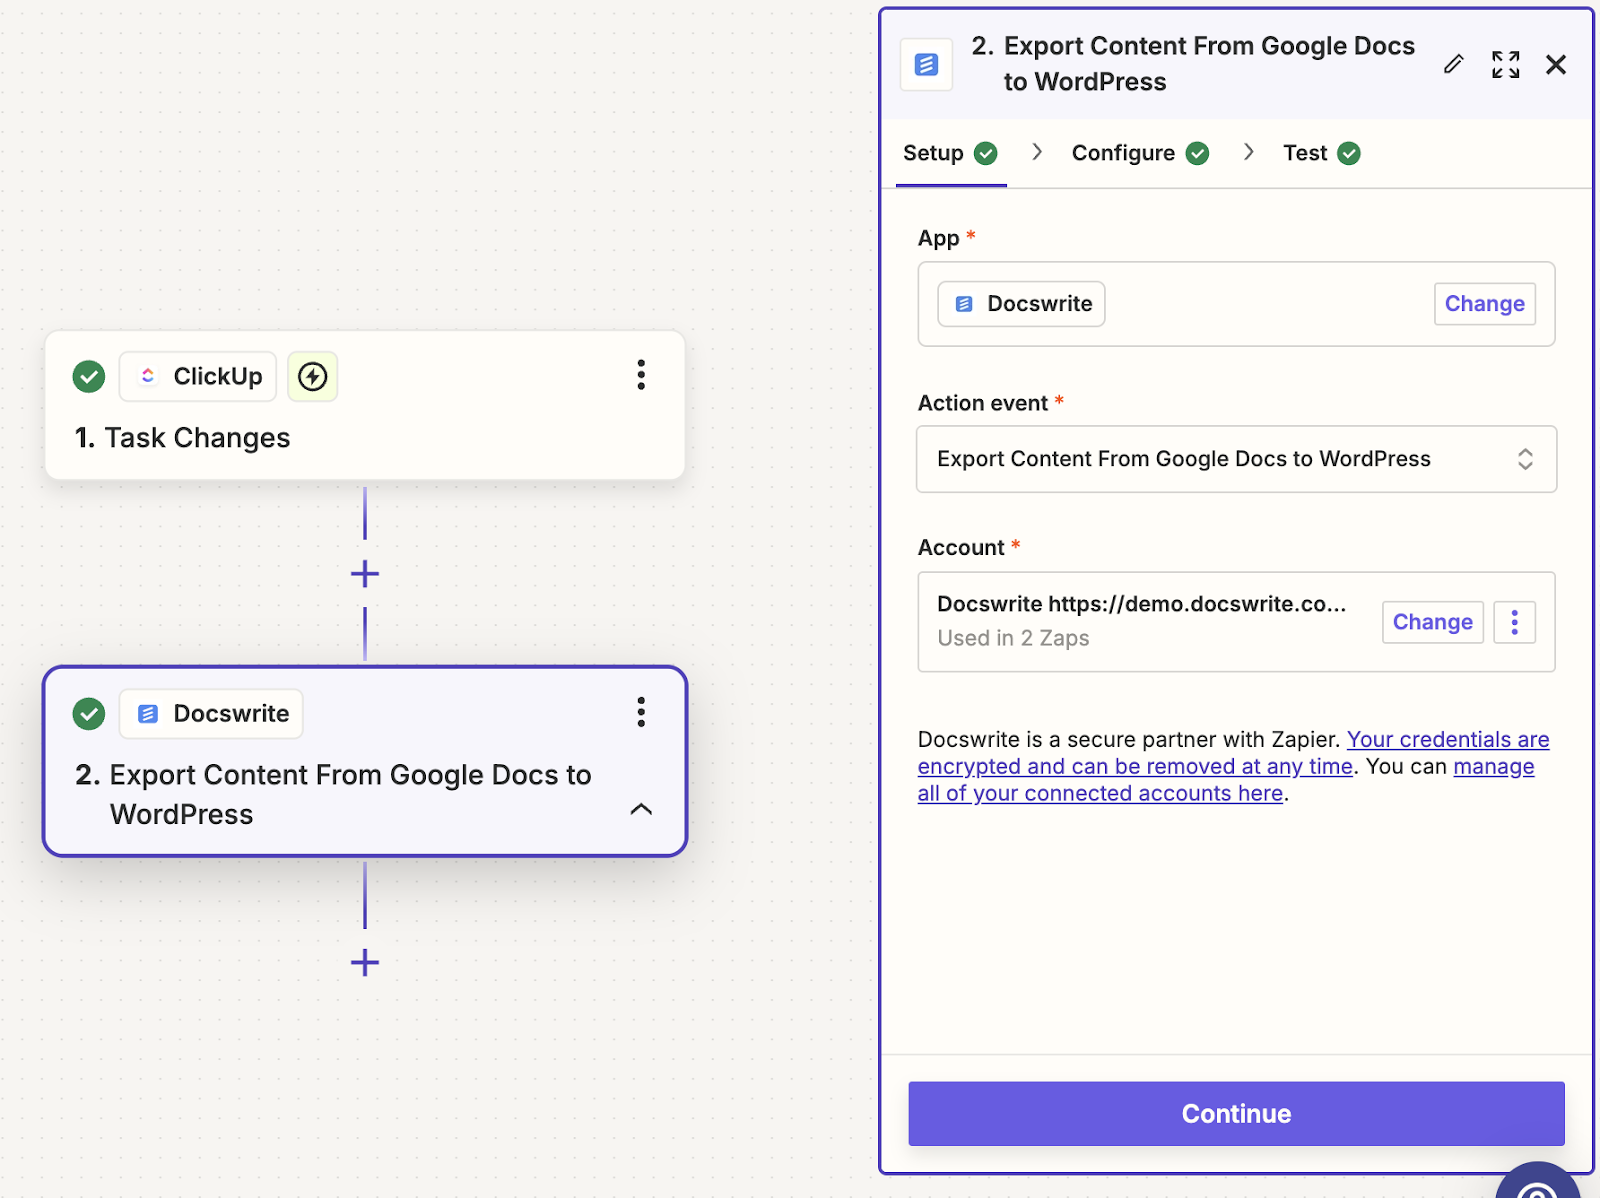
- Select the Action Event: Choose "Export Content from Google Docs to WordPress."
- Connect Your Docswrite Account:
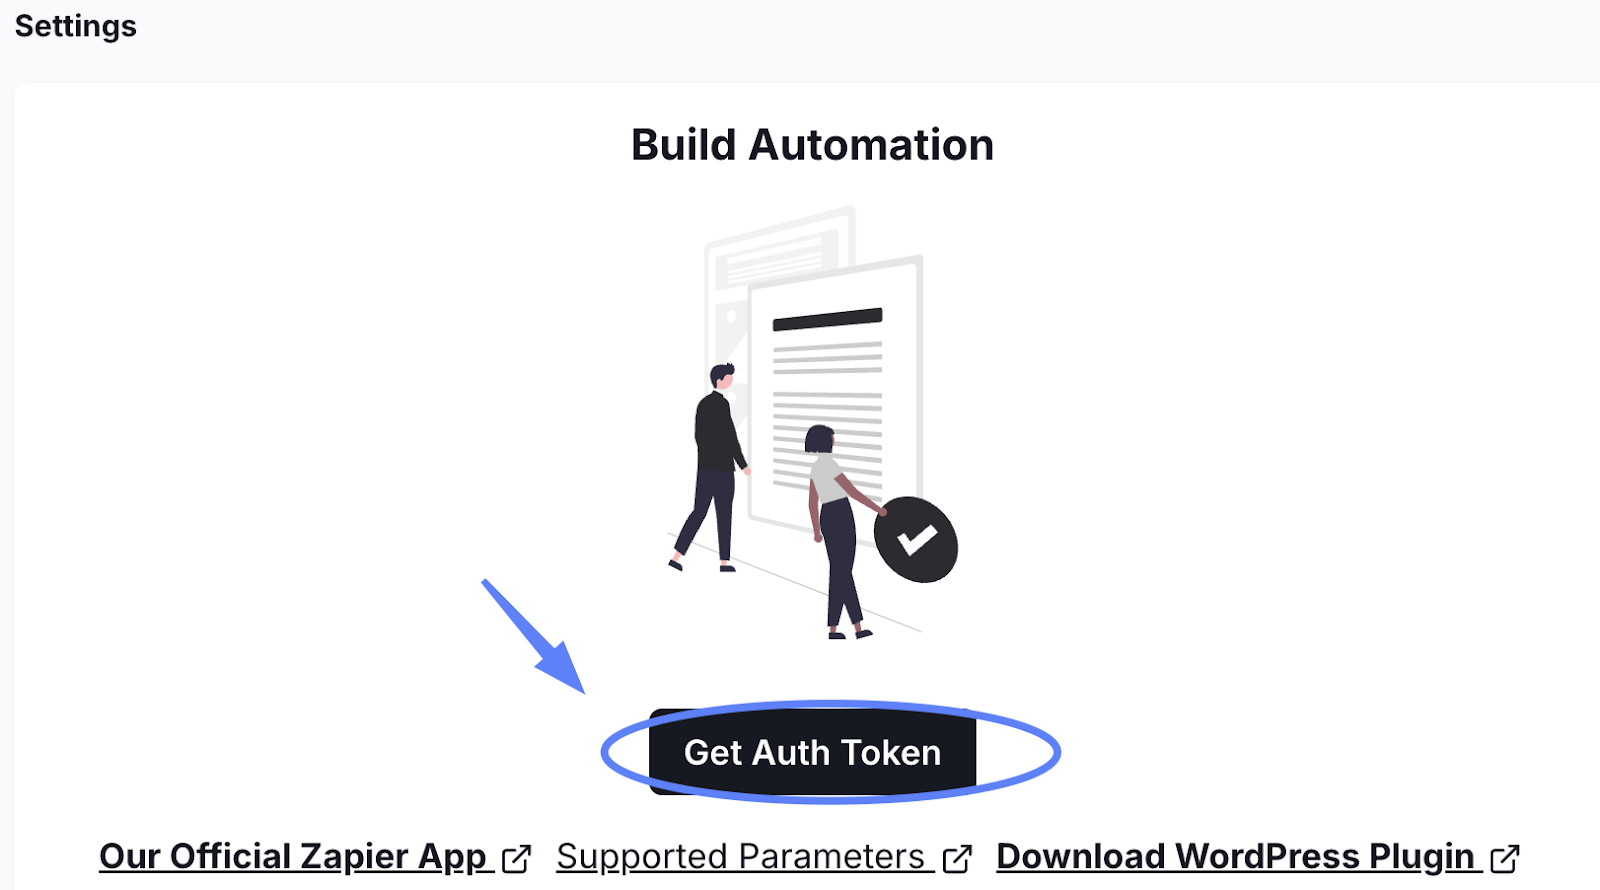
- Authorize Zapier to access to Docswrite Dashboard
- Click Dashboard for your Site
- Click on the Settings tab on the left
- Click on the Get Auth Token button on the top
- Set Up Post Details:
- Title: Map the Trello card title to the post title.If you don’t write any title, Docwrite will get the title written on the Google Docs.
- Google Docs URL: Add the tag that you created on ClickUp "Google Docs Link" - under "Task Custom Fields Value"
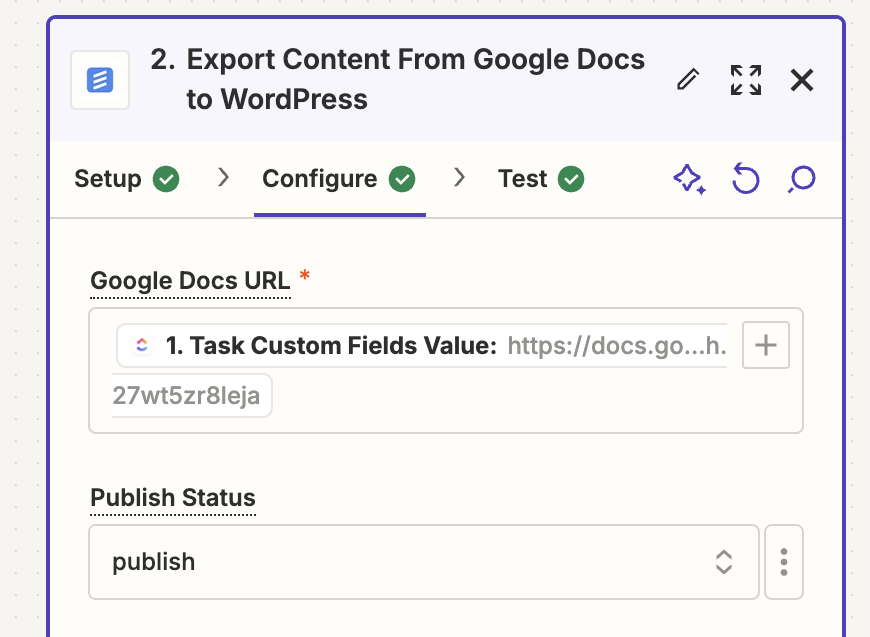
- Status: According to your needs, you can choose "Publish" to publish the post immediately, or select "Draft" if you want to review it first. (You can add a custom field that you created on Trello to control the publication status).
Step 5: Test Your Zap
- Test the Zap: Run a test to ensure that a new card in Trello creates a post in WordPress.
- Check Your WordPress Site: Visit your WordPress site to confirm that the post has been published successfully.