
How to Create a Folder in Gmail: A Step-by-Step Guide
If you're managing a flood of emails in your Gmail account, keeping everything organized can be a challenge. One of the best ways to sort your emails is by using folders—or as Gmail calls them, "labels." Labels help you categorize, prioritize, and find your emails more efficiently. In this guide, we’ll show you how to create folders in Gmail so that your inbox can be a clean and productive space.
Here’s how to get started:
1. Open Gmail and Sign In
First, head over to Gmail and sign in to your account using your credentials. Once you're logged in, you will see your inbox.
2. Navigate to the Sidebar
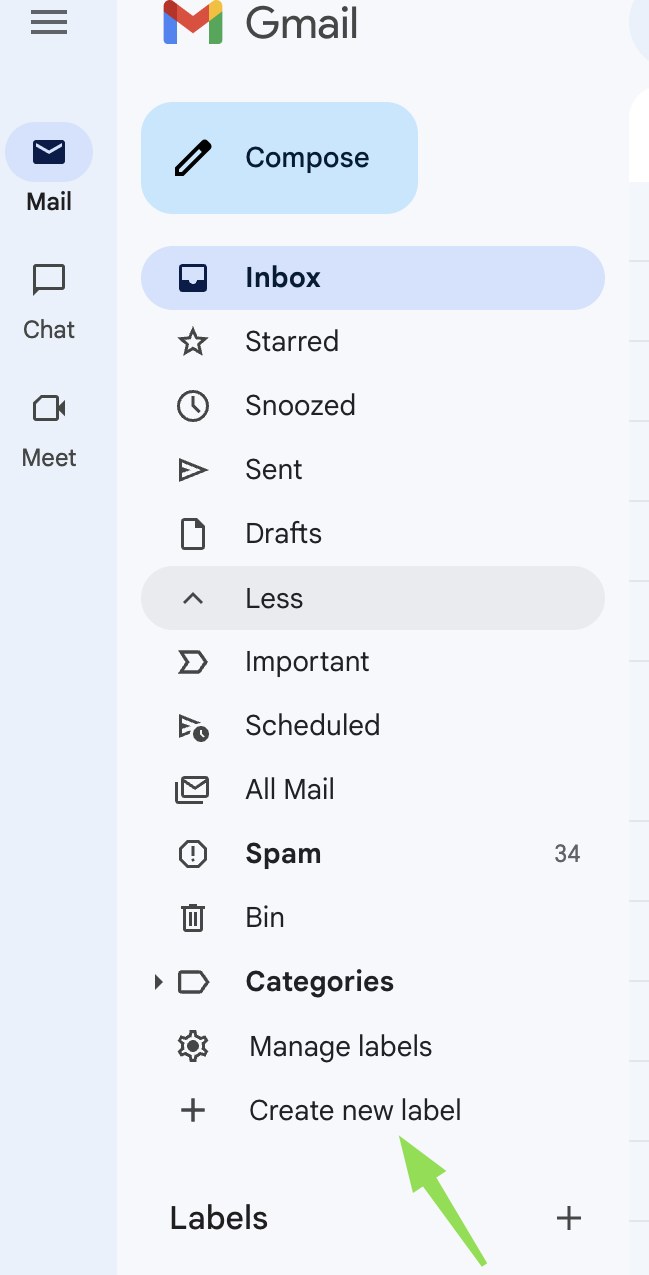
On the left-hand side of your screen, you'll see a sidebar that contains default sections like "Inbox," "Sent," and "Trash." Scroll down to the bottom of the sidebar and click on "More" to expand additional options.
3. Click on "Create New Label"
After expanding the options, keep scrolling until you see the "Create new label" button. This option allows you to create a custom label, which functions like a folder. Click on it to proceed.
4. Name Your Label (Folder)
Once you've clicked on "Create new label," a window will pop up prompting you to name your new label. Give your label a name that makes sense for organizing your emails. For example, you might name it "Work," "Invoices," or "Projects." Once you’ve entered the name, click Create.
5. Nest Label (Optional)
If you want to nest your label (which means creating a subfolder), Gmail offers this option. In the same pop-up window, check the box that says "Nest label under" and select a parent label to organize your labels in a hierarchy.
6. Apply the Label to Existing Emails
Now that your label is created, you can apply it to existing emails. Go to your inbox and select the email you want to categorize. Click on the label icon at the top of the screen and choose the label you just created. You can apply multiple labels to a single email.
7. Use Filters to Automate Labeling (Optional)
For a more hands-off approach, Gmail lets you automatically sort incoming emails using filters. To create a filter, click on the gear icon in the upper-right corner and select "See all settings." Then, go to the Filters and Blocked Addresses tab, click Create a new filter, and set your criteria (like the sender’s email or keywords). Once you’ve set up the filter, choose the option to "Apply the label" and select the appropriate label.
FAQ: Creating Folders in Gmail
Q: What is the difference between a label and a folder in Gmail?
A: Gmail uses labels instead of traditional folders. While folders can hold emails in one location, labels allow you to categorize emails and apply multiple labels to a single email. This makes it easier to organize and search for emails.
Q: Can I delete a label after creating it?
A: Yes, you can delete a label anytime. Simply go to the label in the left sidebar, click on the three dots next to the label, and select Delete label. Deleting a label will not delete the emails under it.
Q: Can I create a folder within another folder in Gmail?
A: Yes, Gmail allows you to nest labels under parent labels. This lets you organize your labels in a hierarchy, much like folders and subfolders.
Q: Can I apply multiple labels to one email?
A: Absolutely! Gmail allows you to apply as many labels as you'd like to a single email. This is one of the key advantages of Gmail’s label system.
Q: How do I remove a label from an email?
A: To remove a label, open the email, click the label icon, and deselect the label you want to remove. Alternatively, you can click the small "x" next to the label at the top of the email.