Google Docs to WordPress Through Docswrite

Transferring content from Google Docs to WordPress can be a tedious task if done manually. Thankfully, with Docswrite, this process becomes seamless and efficient. In this article, we’ll explore how to use Docswrite to easily publish your Google Docs content to your WordPress site in just a few simple steps.
Step-by-Step Guide to Transfer Google Docs to WordPress Using Docswrite
Step 1: Install and Activate the Docswrite Plugin
- Log into Your WordPress Dashboard: Start by accessing your WordPress admin panel.
- Navigate to Plugins: Click on the "Plugins" option on the left-hand menu.
- Add New Plugin: Click on the "Add New" button.
- Search for Docswrite: In the search bar, type "Docswrite" and hit Enter.
- Install the Plugin: Locate the Docswrite plugin and click on the "Install Now" button.
- Activate the Plugin: Once installed, click on "Activate" to enable the plugin.

Step 2: Connect Your Google Docs Account
- Access the Docswrite Settings: In the WordPress dashboard, find the Docswrite settings under the "Settings" menu.
- Authorize Google Account: Click on the "Connect to Google" button. You will be prompted to log into your Google account.
- Grant Permissions: Allow Docswrite to access your Google Docs files by granting the necessary permissions.
Step 3: Prepare Your Document in Google Docs
- Open Google Docs: Navigate to the document you want to transfer.
- Format Your Content: Ensure your document is properly formatted, as this will affect how it appears in WordPress.
- Add Images (If Needed): Upload any images directly into your Google Docs to ensure they’re included in the transfer.
Step 4: Publish Your Document to WordPress
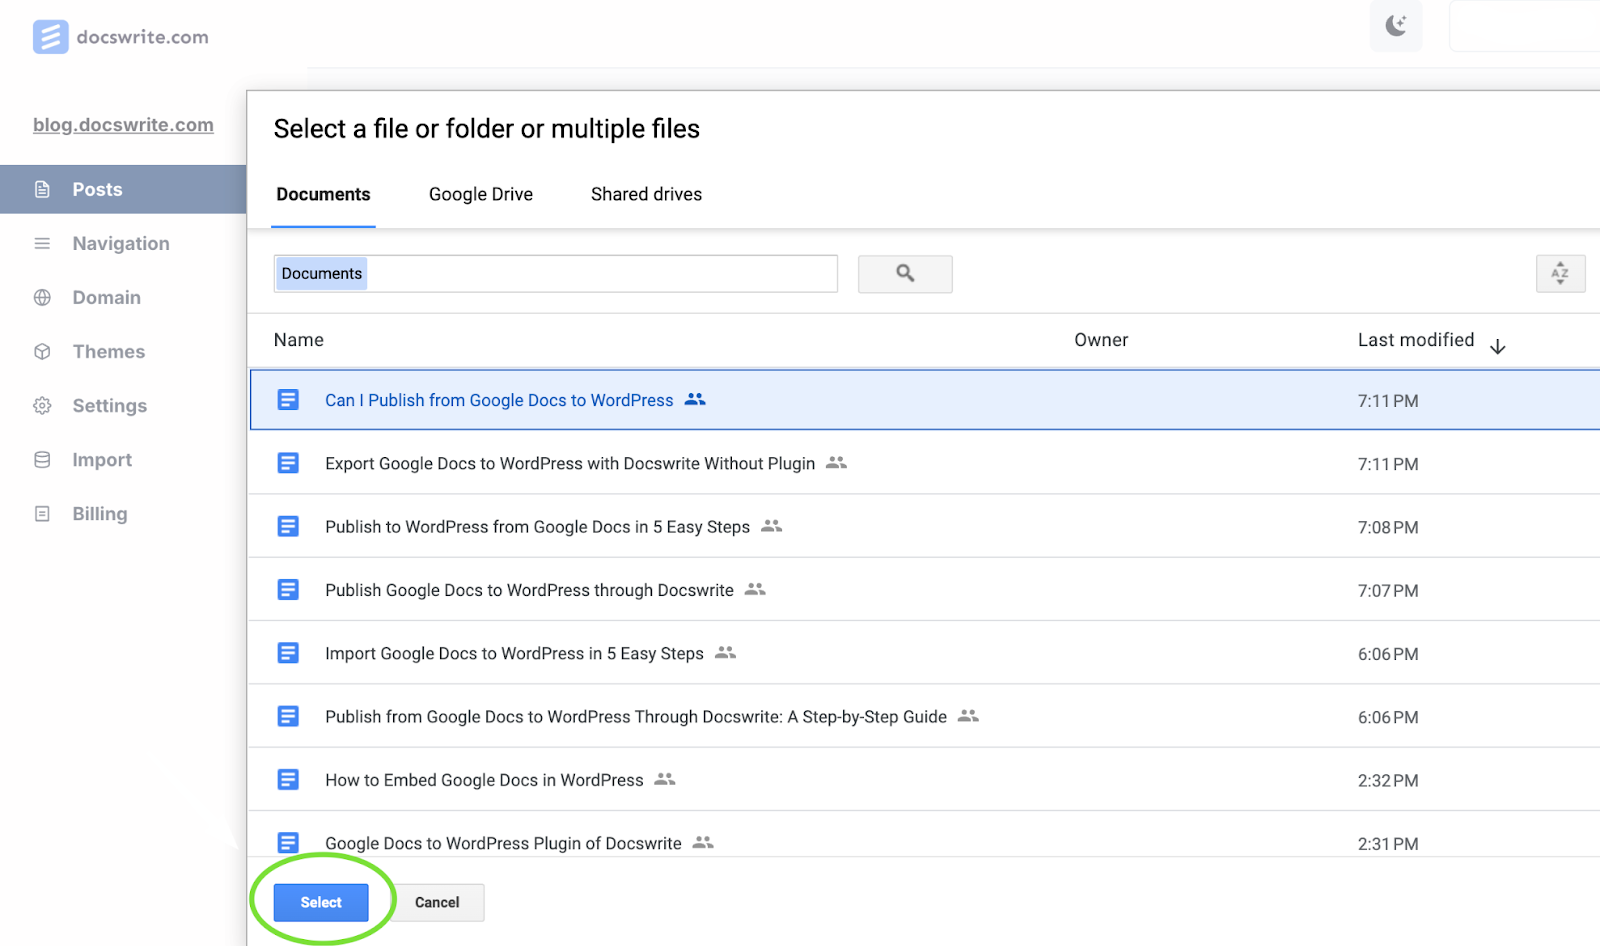
- Use the Docswrite Toolbar: In Google Docs, you’ll find a new Docswrite toolbar after connecting your account.
- Select Your Document: Click on the "Publish to WordPress" option.
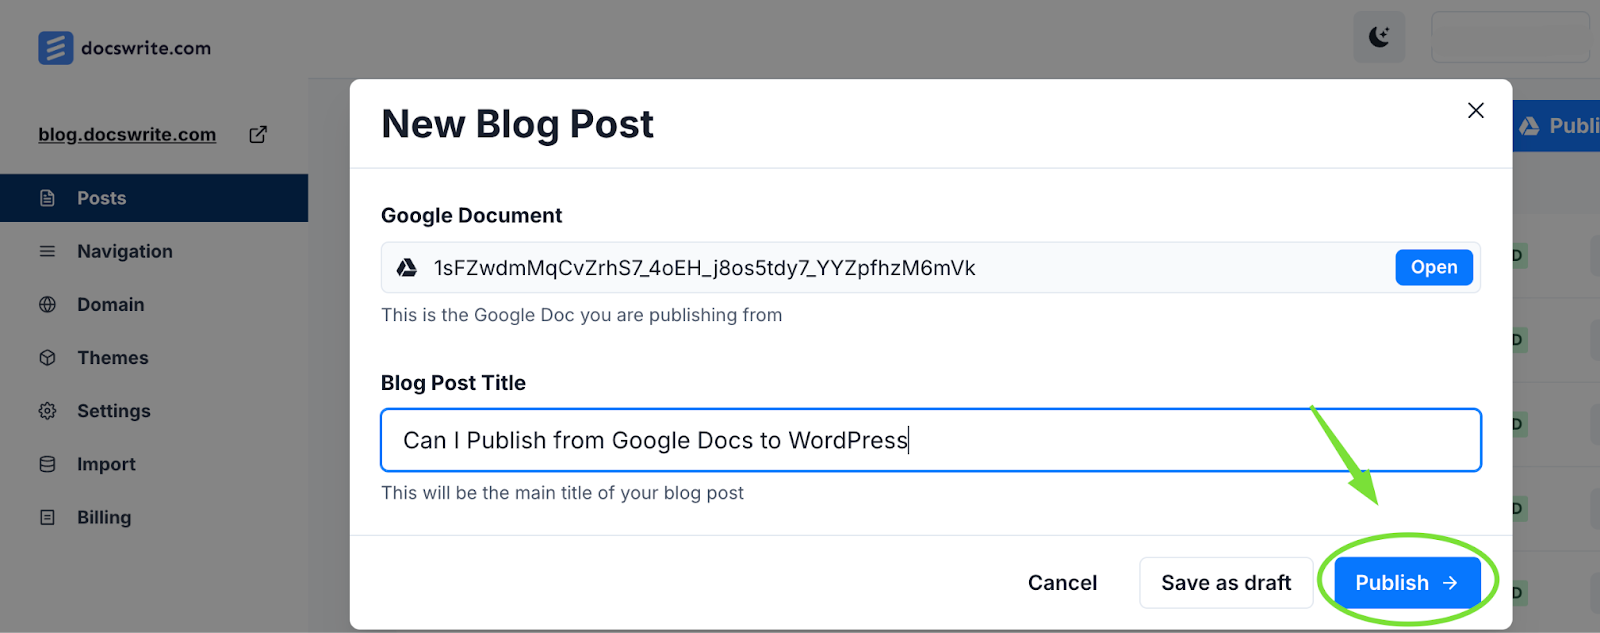
- Choose Your Settings: Customize settings like post status (draft or published), categories, and tags.
- Hit Publish: Click the "Publish" button, and your content will be automatically transferred to your WordPress site.


Step 5: Review and Edit in WordPress
- Log into WordPress: Return to your WordPress dashboard.
- Find Your Post: Navigate to "Posts" and locate the newly published article.
- Edit as Necessary: Click on the post to make any additional edits or adjustments to the formatting.
Frequently Asked Questions (FAQ)
Q1: What is Docswrite?
A: Docswrite is a WordPress plugin designed to facilitate the seamless transfer of content from Google Docs to WordPress, streamlining the publishing process for users.
Q2: Can I transfer images from Google Docs to WordPress using Docswrite?
A: Yes, images inserted into your Google Docs document will also be transferred to your WordPress post when using Docswrite.
Q3: Is Docswrite free?
A: Docswrite offers both free and premium versions, providing various features depending on your needs.
Q4: Will I need to format my document after publishing?
A: While Docswrite does a great job of retaining formatting, it's always a good practice to review and make any necessary adjustments after the transfer.
Q5: How can I troubleshoot if my document doesn’t transfer?
A: First, ensure that you have granted all necessary permissions. If issues persist, check for plugin updates or consult the Docswrite support documentation.